
Installing a tankless electric water heater is a task that demands precision and adherence to specific guidelines to ensure safe and efficient operation. This DIY guide aims to walk homeowners through the step-by-step process of installation, from preparation to the final testing. It's crucial to follow the manufacturer's instructions, use the right materials, and understand the intricacies of electrical and plumbing systems. While this guide provides a comprehensive overview, seeking professional help is recommended for those uncomfortable with any part of the process.
Key Takeaways
- Prioritize safety by disconnecting power and water supply before starting the installation, and always follow the manufacturer's guidelines.
- Properly mount the water heater in an appropriate location and ensure all connections, including pipes and electrical components, are secure.
- Select the correct pipe materials and valves for your system, and double-check for leaks and proper operation after installation.
- Inspect all electrical connections carefully to prevent potential hazards and ensure the system's safe operation.
- Test the system thoroughly after installation, including temperature settings and water flow, to confirm everything is working as expected.
Preparing for Installation
Safety First: Cutting Off Power and Water Supply
Before embarking on the installation of your new electric tankless water heater, ensure all power and water supplies are disconnected. This is a crucial step to prevent any accidents and to prepare the workspace for the upcoming tasks.
- Turn off the power at the circuit breaker or fuse box to eliminate electrical hazards.
- Close the cold water inlet valve to halt the flow of water into the heater.
- Attach a garden hose to the heater's drain valve, directing it to a suitable location for water disposal.
Remember, safety is paramount when dealing with electrical connections and water systems. If you're unsure about any step, consider seeking professional assistance.
By following these preliminary steps, you'll create a safe environment to work in and protect yourself from potential harm. It's also a good practice to double-check that the power and water are indeed cut off before proceeding.
Draining the Old Water Heater
Before the installation of your new electric tankless water heater can begin, it is crucial to properly drain the old unit. Ensure all power to the unit is shut off at the main circuit breaker to prevent any electrical hazards. Follow these steps to safely drain your old water heater:
- Shut off the main water supply to prevent any new water from entering the tank.
- Connect a garden hose to the drain valve located at the bottom of the tank, and lead the hose to an appropriate drain or outside area.
- Open the hot water taps in your home to allow air into the system, facilitating a faster drainage.
Once the tank is fully drained, inspect the old pipes for any signs of wear or damage. If solder fittings are present, use the appropriate plumbing tools to loosen and detach them. Replace any corroded fittings to ensure a secure and efficient setup for your new tankless water heater.
Carefully remove any insulation from the pipes, keeping it intact for potential reuse after the new heater is installed. This step is essential for maintaining the efficiency of your hot water system.
Gathering Necessary Tools and Materials
Before embarking on the installation of your electric tankless water heater, it's imperative to have all the necessary tools and materials at your disposal. This preparation is key to a smooth and uninterrupted installation process.
- Adjustable wrench
- Pipe cutter or hacksaw
- Screwdriver
- Teflon tape or pipe dope
- Plumber's tape
- Pipe fittings and connectors
- Mounting brackets and screws
- Electric drill and bits
Ensure that each item is accounted for and in good working condition. Remember, a well-prepared workspace is the foundation of a successful DIY project.
By meticulously preparing your tools and materials, you're setting the stage for a hassle-free installation. This step cannot be overstated in its importance.
As you gather your tools, pay special attention to the pipe cutter or hacksaw, as a clean cut is essential for proper pipe alignment and a leak-free system.
Mounting the Tankless Water Heater

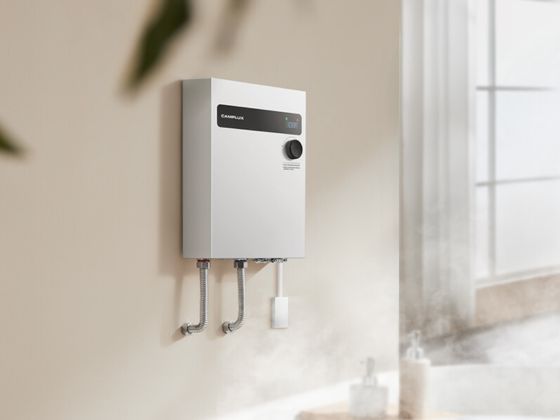
Choosing the Right Location
The success of a DIY electric tankless water heater installation hinges on selecting the optimal location. Proper placement is crucial for efficiency and ease of access. Consider proximity to electrical and plumbing connections to minimize additional work and potential complications.
- Under-Stair Storage: If you have unused space under your stairs, it can be an excellent location for installing a tankless water heater.
- Closet or Utility Room: Ensure adequate ventilation and accessibility for maintenance.
- Exterior Walls: Avoid if possible to reduce the risk of freezing in colder climates.
When considering location, also account for the unit's clearance requirements and the need for a nearby electrical outlet. Adhering to the manufacturer's guidelines is essential for a safe and effective installation.
Refer to the Electric tankless water heater installation guide for detailed instructions on space requirements and safety precautions. Remember, the right location will not only facilitate a smoother installation process but also contribute to the long-term performance of your water heater.
Securing the Mounting Hardware
Once you've chosen the ideal location for your electric tankless water heater, it's time to secure the mounting hardware. Ensure that the mounting brackets or straps are suitable for the weight of the unit and the type of wall material you're working with. Use an electric drill and the appropriate bits to affix the hardware firmly to the wall.
- Adjustable wrench
- Electric drill and bits
- Mounting brackets and screws
Before proceeding, check that the water heater is perfectly level. An unevenly mounted heater can lead to operational problems or even damage over time. Use a spirit level to verify the alignment and adjust as necessary. Once the hardware is in place, you can move on to attaching the water heater unit itself.
It is crucial to follow the manufacturer's installation diagram closely to avoid any complications during the installation process.
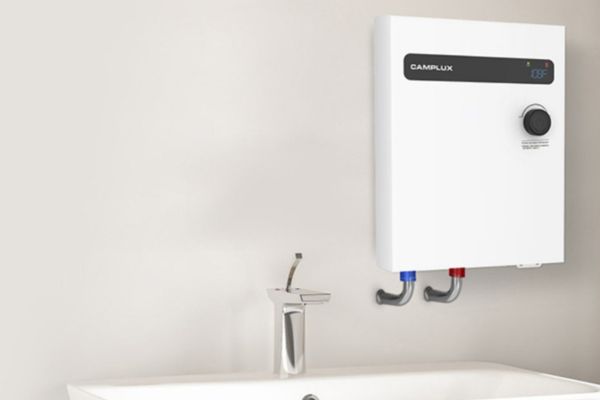
Attaching the Water Heater Unit
With the mounting hardware securely in place, it's time to attach the water heater unit. Carefully align the unit with the mounting brackets or straps, ensuring it is level before fastening it to the wall. This step is crucial for the stability and operation of your electric tankless water heater.
Tools needed for installing an electric tankless water heater are essential at this stage. Make sure you have all the necessary equipment at hand before proceeding. Here is a list of tools you might need:
- Adjustable wrench
- Screwdrivers (Phillips and flat-head)
- Pipe wrench
- Tape measure
- Level
- Drill and drill bits
Once the unit is in place, double-check all connections. It's important to ensure that everything is tight and secure to prevent any potential issues.
After attaching the unit, the next step is to connect the supply lines. This is a critical step, as secure connections are necessary to avoid leaks and ensure the system operates efficiently.
Connecting the Pipes

Selecting Proper Pipe Materials
When embarking on the installation of an electric tankless water heater, selecting the right pipe materials is a pivotal step. The materials you choose must be compatible with the high temperatures and flow rates of your system. Common options include stainless steel, copper, and PVC, each with its own advantages. Stainless steel pipes offer durability and resistance to corrosion, making them a solid choice for longevity. Copper pipes excel in thermal conductivity, which is beneficial for hot water distribution. However, PVC pipes, while cost-effective and easy to work with, may not be suitable for all temperature ranges.
- Teflon tape
- Copper tubing
- Copper adapters and fittings
- Soldering supplies
- Dielectric unions
It's essential to follow the manufacturer's installation diagram to ensure proper alignment and secure connections. Use Teflon tape on pipe threads to prevent leaks, and if your installation requires soldering, make sure to have the necessary supplies on hand. Dielectric unions are crucial when connecting different types of metal pipes to prevent corrosion. Above all, compliance with local plumbing regulations is not just a recommendation—it's a requirement.
Aligning and Securing the Pipes
Proper alignment of the pipes is critical for a secure and leak-free connection. Use appropriate pipe fittings and connectors that match the pipe materials to ensure precision in alignment. It's essential to secure the connections tightly using pipe clamps or compression fittings to prevent any potential issues with the pipe system.
Leave enough space between the pipes and the wall to allow for expansion and contraction. This space is crucial to accommodate the natural movement of the pipes due to temperature changes.
By following these steps, you can ensure the longevity and reliability of your tankless water heater's piping system.
Here are the steps to align and secure the pipes effectively:
- Choose the appropriate pipe materials based on your installation requirements.
- Align the pipes carefully to ensure a secure and leak-free connection.
- Secure the pipe connections tightly using clamps or compression fittings.
- Allow enough space between the pipes and the wall for expansion and contraction.
- Follow the manufacturer's installation diagram for precise pipe connections and placement.
Testing for Leaks and Proper Operation
After the installation of your electric tankless water heater, it's essential to ensure the system is leak-free and operating correctly. Begin by inspecting all connection points, particularly where supply lines meet the heater. Connections should be snug and properly sealed to prevent any water damage.
- Apply soapy water to all joints and seals.
- Look for bubbles which indicate a leak.
- Use professional leak detection equipment if available.
Remember to comply with local plumbing regulations during this process, as this will help prevent future issues and ensure a safe and efficient operation. Once you've confirmed there are no leaks, run hot water through each outlet to test for consistent temperature and pressure.
It's crucial to address even the smallest leaks immediately to avoid larger problems down the line. Regularly check your system to maintain its efficiency and safety.
Electrical and Valve Installations
Installing Flow and Pressure Valves
Flow and pressure valves are critical components in the setup of your electric tankless water heater. They help maintain the correct water flow and pressure, which is essential for the heater's efficiency and longevity. Install the valves according to the manufacturer's instructions and ensure they comply with local plumbing regulations.
Proper installation of these valves is not just about following the steps; it's about safeguarding your system against pressure-related damage. Remember, incorrect installation can lead to water leakage or even damage to the water heater.
After installing the valves, it's crucial to bleed the hot water system to remove any air trapped in the lines. This step will help prevent issues such as inconsistent water temperature or noisy operation.
To ensure that the installation works as expected, test the system by closing the valve to see if it removes pressure from the heater. This is particularly important if the heater is installed between the shower valve and the shower head.
Bleeding the Hot Water System
After bleeding the hot water system, the next critical step is to inspect the electrical connections. Ensure all wiring is properly connected and secured to prevent any electrical hazards. This inspection is vital for the safety and functionality of your tankless water heater.
Electrical connections should be checked for tightness and corrosion. Loose connections can lead to overheating and potential fire risks, while corrosion can cause poor performance and equipment failure. Use the following checklist to guide your inspection:
- Verify that all electrical connections are tight.
- Inspect for any signs of corrosion or damage.
- Confirm that the wiring is in accordance with local codes.
- Test the system's electrical components for proper operation.
It is essential to address any issues immediately to ensure the safe and efficient operation of your tankless water heater.
Inspecting Electrical Connections
After ensuring that all pipes and valves are correctly installed, the next critical step is to inspect the electrical connections. This involves a careful examination of the wiring to confirm there are no loose or exposed wires. It's essential to check for secure connections and the absence of corrosion or damage. Additionally, compliance with the manufacturer's instructions and local electrical codes is mandatory.
During the inspection, use a voltage tester to verify proper grounding, which is vital for preventing electrical shocks or hazards. Always adhere to safety precautions when dealing with electricity. If there's any uncertainty, it's prudent to seek the assistance of a professional electrician.
Remember, a meticulous inspection of the electrical connections is key to the safe and efficient operation of your tankless water heater.
Here are some points to consider during the inspection:
- Ensure that the wiring is properly connected and positioned.
- Use a voltage tester to check for proper grounding.
- Look for signs of wear or damage in the electrical connections.
- Confirm that the wire size and amperage match the specifications in the installation manual.
- Check that your breaker box can accommodate the water heater load.
Final Steps and Testing
Turning on the Circuit Breaker
With the installation process complete, it's time to bring your tankless water heater to life. Ensure that all connections are secure and double-check your work before proceeding to this crucial step. Switching on the circuit breaker is the final act that will energize your water heater, allowing it to begin its efficient operation.
Before flipping the switch, take a moment to review the entire installation. This is not just a good practice—it's a safeguard against potential issues that could arise from a hasty start-up.
Remember to adhere to the manufacturer's instructions and local codes. The correct sequence of actions is vital for both safety and functionality. Here's a quick checklist to run through before powering up:
- Verify that all electrical connections are correct and secure.
- Confirm that the water heater is properly mounted and the pipes are aligned.
- Check that the flow and pressure valves are installed as per the guidelines.
Once satisfied with the inspection, you can confidently switch on the circuit breaker. This will initiate the heating process, and soon, you'll be ready to enjoy the convenience of on-demand hot water.
Inspecting for Any Issues
After the tankless water heater is installed, a thorough inspection is essential to ensure everything is functioning correctly. Start by inspecting the electrical connections; look for any loose or exposed wires. It's important to confirm that all connections are secure and show no signs of corrosion or damage. Compliance with the manufacturer's instructions and local electrical codes is also crucial.
Ensure that the water supply valve is fully open and there are no blockages or leaks in the pipes leading to the unit.
Use a voltage tester to check for proper grounding, and always adhere to safety precautions when dealing with electricity. If you're not confident in your ability to inspect the electrical setup safely, do not hesitate to consult a professional electrician.
Keep an eye out for any unusual noises or drips as the tank fills, which could indicate problems with water flow, pressure, or potential leaks. Addressing these issues promptly can prevent future complications and ensure the longevity of your water heater.
Testing Temperature and Outlets
Once the installation is complete, testing the temperature and outlets is a critical step to ensure your electric tankless water heater is functioning correctly. Begin by turning on the hot water faucet closest to the unit and allow the water to run for a few minutes, establishing a consistent flow. Then, use a thermometer to measure the water's temperature at the faucet.
Compare the measured temperature with the set temperature on the tankless water heater. They should be closely aligned. Proceed to test all hot water outlets in your home, including showers and sinks, to confirm uniform heating across all fixtures.
If discrepancies in temperature or water pressure are observed, it may signal the need for adjustments or further inspection. In such cases, consulting a professional plumber is advisable to address any potential issues.
By methodically testing each outlet, you can verify the efficient and effective operation of your tankless water heater. Should any irregularities arise, they must be rectified to ensure optimal performance and safety.
As you approach the final steps and testing phase of your project, remember that the right tools and equipment can make all the difference. Ensure you're fully equipped by visiting our website, where you'll find a comprehensive range of products designed to enhance your outdoor, mobile home, or residential needs. From portable water heaters to electric tankless models, we have everything you need to complete your setup with confidence. Don't hesitate, take the final step and explore our collection today!
Conclusion
In conclusion, the DIY installation of an electric tankless water heater is a meticulous process that demands attention to detail and adherence to safety protocols. By following the step-by-step guide and installation tips provided, homeowners can undertake this project with confidence. However, it's important to recognize the complexity and potential risks involved. If at any point the installation process seems overwhelming or if safety concerns arise, seeking the help of a professional plumber is highly recommended. A successful DIY installation not only ensures a continuous supply of hot water but also contributes to the efficient operation of your household systems. Always remember to consult the manufacturer's instructions and local regulations to ensure a safe and compliant installation.
Frequently Asked Questions
Do I need to turn off the power and water supply before installing a tankless water heater?
Yes, for safety reasons, it is crucial to cut off the power at the circuit breaker and shut off the water supply before beginning the installation process.
How do I drain the old water heater before installing a new one?
To drain the old water heater, you'll need to connect a hose to the drain valve and release the water into an appropriate drain or outside area.
What are the necessary tools and materials for installing a tankless water heater?
You will need various tools such as wrenches, screwdrivers, a pipe cutter, and materials including piping, valves, and mounting hardware specified by the manufacturer.
How do I choose the right location for my tankless water heater?
The right location should be close to the main water supply and power source, have proper ventilation, and comply with local building codes and manufacturer guidelines.
How do I test for leaks after connecting the pipes to the tankless water heater?
After connecting the pipes, turn on the water supply and inspect all connections for any signs of leakage. Use soapy water to help identify any small leaks.
What should I do if I'm not comfortable with the electrical installation of a tankless water heater?
If you are unsure or uncomfortable with the electrical installation, it is highly recommended to hire a professional electrician or plumber to ensure safe and proper installation.